Installing New Bees: Everything That Actually Matters in the First 30 Days
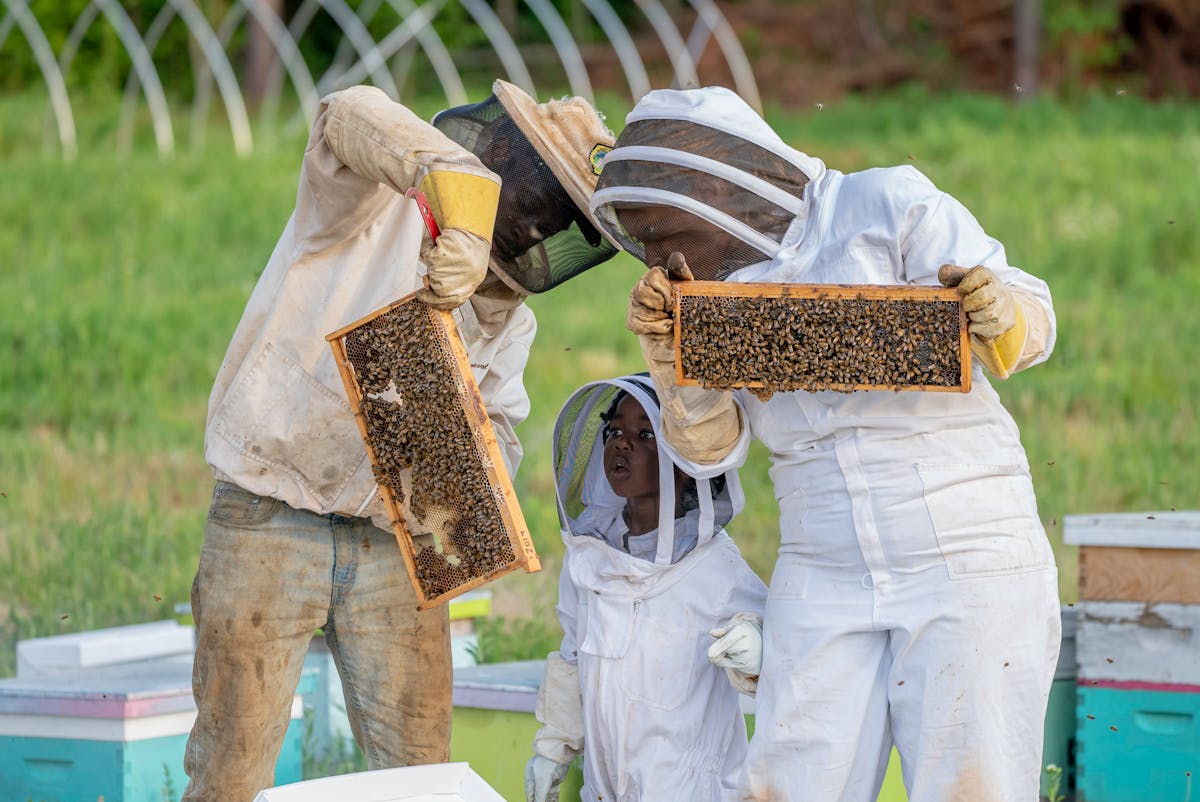
Here's what actually kills most new colonies: it's not the install. The install is the easy part. It's the 30 days after — the feeding mistakes, the over-inspecting, the panic at Day 10, and the complete absence of any recorded data — that turns a healthy package into a dead-out by June.
I've installed somewhere north of 200 packages and nucs over the years. The ones I lost weren't the ones with rough installs. They were the ones I didn't track closely enough afterward. The ones where I thought "they seem fine" instead of knowing they were fine because the data said so.
Here's everything that actually matters — and a few things nobody told me until I'd already learned them the expensive way.
Before the Bees Arrive: The Setup Nobody Thinks About
Most articles tell you to have your equipment ready. Obviously. But here's what actually makes the difference:
- Hive placement is permanent. Once bees orient to a location, moving the hive even 3 feet causes confusion. Pick the spot carefully: morning sun, afternoon shade if you're in a hot climate, windbreak from the north, slightly elevated. Get it right the first time.
- Have 2 gallons of 1:1 syrup ready, not 1. A new package will go through a gallon faster than you expect. Running out on Day 3 and scrambling to make more is a failure of planning, not beekeeping.
- Entrance reducer on the smallest opening from Day 1. A 3-pound package can't defend a full entrance. Robbing from established colonies in the neighborhood will destroy them before they get started.
How BeeKeeperVoice helps
Set up the apiary and hive in the app before the bees arrive. Scan an NFC tag onto the new hive body. When installation day comes, the hive is already in the system — ready to log from minute one. No scrambling to set things up while you've got a box of 10,000 buzzing bees in your hands.
Package Install: The 10-Minute Version
You don't need a 45-minute YouTube tutorial for this. Here's what actually happens:
- Remove the can and queen cage. Check the queen — she should be alive and moving. If she's dead, call your supplier immediately.
- Check the candy plug. Make sure there's a candy plug in the queen cage (not just a cork). The bees need to eat through it to release her. If there's only a cork, poke a small hole in the candy end — don't remove the cork.
- Place the queen cage between frames 4 and 5, candy end facing up, screen side visible so bees can access it. Secure it with a rubber band or wedge it between the frames.
- Shake the bees in. Firm, confident shakes. Don't be gentle — they won't come out. Remove 3-4 frames to give them room, dump the bees, replace the frames.
- Install the feeder, close up, walk away. Entrance reducer on. Inner cover on. Outer cover on. Done.
The whole thing takes 10 minutes. The next 30 days take your full attention.
How BeeKeeperVoice helps
"Package installed. Queen alive, good color, active. Candy plug intact. Started 1:1 syrup, full gallon. Queen from Johnson Apiaries, marked blue." Logged in 10 seconds. Queen source, marking color, and install date are now permanently on record. Set a reminder: "Check queen release in 4 days."
Nucs Are Not Packages (Stop Treating Them the Same)
A nuc is a functioning mini-colony. A package is a box of strangers with a queen they've never met. The install process and the first-week expectations are completely different.
Nuc install:
- Transfer frames in the same order they came. Don't rearrange them. The bees organized them that way for a reason.
- The queen is already accepted and laying. You don't need to cage her or wait for release.
- You should have eggs and brood on Day 1. If you don't, something went wrong at the supplier.
- Feed only if there's no nectar flow. A strong nuc with 5 frames of bees may not need syrup if flowers are blooming.
Hard lesson #1: I once rearranged nuc frames to "make them look nicer" in the box. Brood nest got split, queen stopped laying for a week, colony stalled. Leave the frames in order. The bees know what they're doing.
Weigh the Hive on Day 1 (This Changes Everything)
This is the most underrated thing you can do during installation, and almost nobody does it.
Weigh the hive. Write it down. You now have the single most useful data point of the entire season.
Why it matters
Feed consumption rate. You added 8 lbs of syrup. Four days later the hive is 5 lbs lighter. They consumed about 3 lbs of syrup and the rest went to evaporation and comb building. That's a healthy consumption rate. If the hive didn't lose any weight? They're not taking the syrup. That's a problem — possibly a dead queen, possibly a feeder malfunction, possibly syrup that's too cold.
Comb building progress without opening the hive. New wax is heavy. A package drawing comb on foundation will gain 1-2 lbs per week from wax alone, even before the queen starts laying. If weight is flat after two weeks, they're not drawing comb. Something is wrong and you should open up and look.
Nectar flow detection. When the hive suddenly starts gaining 2-4 lbs per day, the nectar flow is on. That's your signal to stop feeding and start thinking about supers. No guessing, no checking bloom charts — the scale tells you exactly when it starts and when it ends.
The population dip is real — and weight confirms it. Around Day 14-21 with a package, the old bees from the package start dying and the new brood hasn't emerged yet. The colony shrinks. New beekeepers panic. But if your hive weight is stable or slowly gaining, the colony is fine — they're building comb and the queen is laying. The weight tells you what your eyes can't.
How to weigh
- Simple: Bathroom scale under one side of the hive. Double the reading. Not precise, but good enough for trends.
- Better: Luggage scale with a strap under the back of the hive. Lift one side, double it. Takes 10 seconds per hive.
- Best: Dedicated hive scale that sits under the bottom board permanently. Logs weight automatically. Expensive (~$100-300) but invaluable if you have multiple hives.
Hard lesson #2: I lost a package colony in May that "looked fine" at every inspection. If I'd been weighing it, I would have seen that it had been losing weight for three weeks straight — they weren't drawing comb, weren't storing syrup, and the queen had quietly failed. By the time I opened it up and found no eggs, it was too late. A $10 luggage scale would have saved a $200 colony.
How BeeKeeperVoice helps
"Hive 5, weight 42 pounds." Two seconds per hive, every visit. Over weeks, the AI tracks the weight curve alongside your inspection notes — correlating weight loss with brood breaks, weight gain with nectar flows, and sudden drops with potential swarms. Ask Hive Command "Which hives lost weight this week?" and instantly spot the ones that need a closer look. Weight data paired with inspection records is the closest thing to X-ray vision in beekeeping.
The Critical First 30 Days: A Timeline
1 Days 1-3: Leave Them Alone
Hardest part of beekeeping. You just installed 10,000 bees and you want to check on them every 6 hours. Don't.
The bees are orienting, the queen is being evaluated by the workers through the cage screen, and the cluster is forming around the brood area. Every time you open the hive, you reset this process. The best thing you can do right now is nothing.
Check the feeder from the outside. Make sure there's syrup. That's it.
2 Days 4-5: Queen Release Check
Open the hive. One job: is the queen cage empty?
- Cage empty, bees calm: Queen is released and accepted. Remove the cage. Close up. Don't hunt for her.
- Cage empty, bees agitated, queen cells being built: They may have killed her. Look for eggs in 5 days. If no eggs, you need a new queen.
- Queen still in cage, bees clustering on it peacefully: Give them 2 more days. The candy is thick. It happens.
- Queen dead in cage: Contact your supplier immediately. You need a replacement queen within 48 hours or the colony will start laying workers.
Don't do this
Do not directly release the queen by removing the cork. If the bees haven't eaten through the candy, they may not have accepted her yet. Direct release of an unaccepted queen = dead queen within hours. Let the candy plug do its job.
3 Days 10-14: The Real First Inspection
This is the inspection that matters. You're looking for one thing: eggs.
Tiny white dots standing upright at the bottom of cells, almost invisible unless you hold the frame at the right angle with the sun behind you. One egg per cell. If you see eggs, your queen is alive and laying. You don't need to find her.
- Eggs present: Everything is working. Check that they're taking syrup and building comb. Close up.
- No eggs but queen was released: Don't panic yet. Some queens take 10-14 days to start laying after a stressful install. Check again in 4 days.
- No eggs at Day 14: Now you can start worrying. Look for the queen. If she's there but not laying, give her 3 more days. If she's gone, you need a new queen immediately.
Also check:
- Are they drawing comb? (If not, check your syrup — they need it for wax production)
- Feeder status — refill if low
- Any signs of robbing at the entrance?
How BeeKeeperVoice helps
"Day 12 inspection. Eggs present on frames 3, 4, and 5. Good pattern. Drawing comb on frame 6. Refilled feeder, one gallon." Every milestone logged. When you ask the AI "How is Hive 5 doing?" it knows: queen released Day 4, eggs confirmed Day 12, comb building on schedule. If you DIDN'T find eggs, the AI flags it: "No eggs logged by Day 14 — queen may not be laying. Inspect again within 3 days."
4 Days 21-28: The Turning Point
If everything went right, the first generation of new brood is starting to emerge around Day 21. The colony is about to turn a corner — population will start climbing instead of declining.
What you should see:
- Capped brood on multiple frames
- New bees emerging (lighter colored, fuzzy)
- Expanding brood pattern
- Comb being drawn on outer frames
- Syrup consumption increasing
What to do:
- Assess brood pattern — tight and solid is good, scattered and patchy needs watching
- First mite wash baseline — get a number now before the population explodes
- Evaluate whether to keep feeding — if they're building fast and flowers are blooming, they may not need it anymore
- Weigh the hive — compare to Day 1. If it's gained 10+ lbs, they're on track.
The 7 Mistakes That Kill New Colonies
- Inspecting every 2-3 days. You're not helping. You're cooling the brood, breaking propolis seals, and stressing a fragile colony. Every inspection costs the colony 24 hours of recovery. Weekly is plenty during the first month. Less is more.
- Not feeding enough. "They seem busy" is not the same as "they have stores." A package has ZERO resources. No comb, no honey, no pollen stores. They need a steady supply of 1:1 syrup until they're drawing comb AND flowers are producing nectar. Most new beekeepers stop feeding 2-3 weeks too early.
- Stopping feeding because the bottle isn't emptying fast. Consumption rate varies with temperature. Below 55°F, bees won't take cold syrup well. That doesn't mean they don't need it — it means you might need to switch to a warmer feeding method or wait for a warm day.
- Queen hunting every inspection. If there are eggs, the queen was there within the last 3 days. You don't need to find her. Searching frame by frame, shaking bees, holding frames up to the light — all of this disrupts the colony for zero useful information. Eggs are proof. Learn to spot eggs and you'll never need to find the queen again.
- No entrance reducer. A new package can't defend itself. Established colonies nearby will rob a weak, syrup-scented hive in an afternoon. By the time you notice, the stores are gone and the colony is demoralized. Keep the reducer on the smallest setting until the colony is strong enough to guard a larger entrance — usually 3-4 weeks minimum.
- Adding a second box too early. The colony should fill 7-8 of 10 frames in the first box before you add another. Adding space too early means they have to heat a larger volume, which slows brood production and comb building. Let them feel slightly crowded before expanding.
- Not recording anything. "I think she was laying last time" is not a record. "Eggs confirmed on frames 3-5, capped brood on 4, syrup consumption 1 lb/day, weight 48 lbs" is a record. One gives you feelings. The other gives you a trajectory. The trajectory is what saves colonies.
When to Worry vs. When to Wait
| Situation | Wait | Worry |
|---|---|---|
| Can't find the queen | Eggs are present — she's there | No eggs after 14 days |
| Small population | Normal for first 3 weeks (population dip) | Still shrinking at Day 28 |
| Not taking syrup | Nectar flow may have started | No stores AND not drawing comb |
| Spotty brood | First laying cycle can be uneven | Still spotty at second cycle (Day 28+) |
| Aggressive at entrance | Defensive during settling in | Getting worse over time |
| Bees bearding outside | Hot day, normal ventilation behavior | Bearding + not drawing comb inside |
| Hive weight dropping | Consuming syrup for wax (normal first 2 weeks) | Dropping for 3+ weeks with no comb being built |
How BeeKeeperVoice helps
Every "wait or worry" decision gets better with data. One note that says "spotty brood" is a question mark. Two notes two weeks apart that both say "spotty brood" is an answer. The AI reads your inspection timeline and flags when patterns shift from "wait" to "worry" — before you have to figure it out yourself.
Hard Lesson #3: The Colony You Don't Track Is the Colony You Lose
I'll be direct about this because it's the most important thing in this entire article.
Every colony I've lost in the first year had the same thing in common: I didn't have enough data to see the problem coming. The queen that failed quietly. The mite load that built while I wasn't testing. The stores that ran out because I assumed they were fine.
The colonies I saved? They were the ones where I could look at a timeline and see: eggs confirmed on this date, brood pattern noted here, weight increasing here, first mite wash here. When something went wrong, I caught it because I had a baseline to compare against.
Your memory is not a record. Your notebook — if you can find it, if you can read your handwriting, if you actually wrote in it with gloves on — is barely a record.
The colonies that make it through their first year are the ones with beekeepers who tracked what mattered, on schedule, every time.
The 30-Day Checklist
Installation Day
- Equipment set up, location finalized
- Queen confirmed alive in cage
- Package/nuc installed, queen cage placed
- Feeder filled with 1:1 syrup
- Entrance reducer on smallest setting
- Hive weighed — baseline recorded
- Queen source, marking color, install date logged
Days 4-5: Queen Release
- Queen cage empty? Remove cage.
- Queen still caged? Wait 2 more days.
- Queen dead? Contact supplier immediately.
- Refill feeder if needed
- Weigh hive — compare to Day 1
Days 10-14: First Real Inspection
- Eggs present? (one per cell, standing upright)
- Comb being drawn on new frames?
- Feeder status — refill
- Signs of robbing at entrance?
- Weigh hive
Days 21-28: The Turning Point
- Capped brood present and emerging?
- Brood pattern assessment (solid vs spotty)
- Population growing?
- First mite wash baseline
- Evaluate continued feeding need
- Weigh hive — should show 8-15 lb gain from Day 1
- Consider timing for second box (7-8 frames drawn)
The Rule of Thumb
Here it is, the one sentence version of this entire article:
Install the bees, feed them relentlessly, inspect on schedule (not on impulse), weigh the hive every visit, and record everything — because the colony you track is the colony you keep.
That's it. Everything else is details. The bees know how to be bees. Your job is to give them resources, stay out of the way, and pay close enough attention to catch problems before they become losses.
The first 30 days set the tone for the entire season. Get them right, and you're ahead of 90% of beekeepers before the first nectar flow even starts.
Track your new colonies from Day 1
BeeKeeperVoice logs installs, queen releases, egg checks, weights, and milestones — all by voice, all hands-free. Try it free for a full month.
Download on App Store